- Materials needed:
- An A4 sheet
- glue,
- 8 square origami sheets(coloured)
- scissors
- a compass
- and a pencil
- PROCEDURE FOR THE TOP OF THE UMBRELLA:
i. Take your 8 square origami sheets and cut circles out of them. Make sure they are all of the same size.

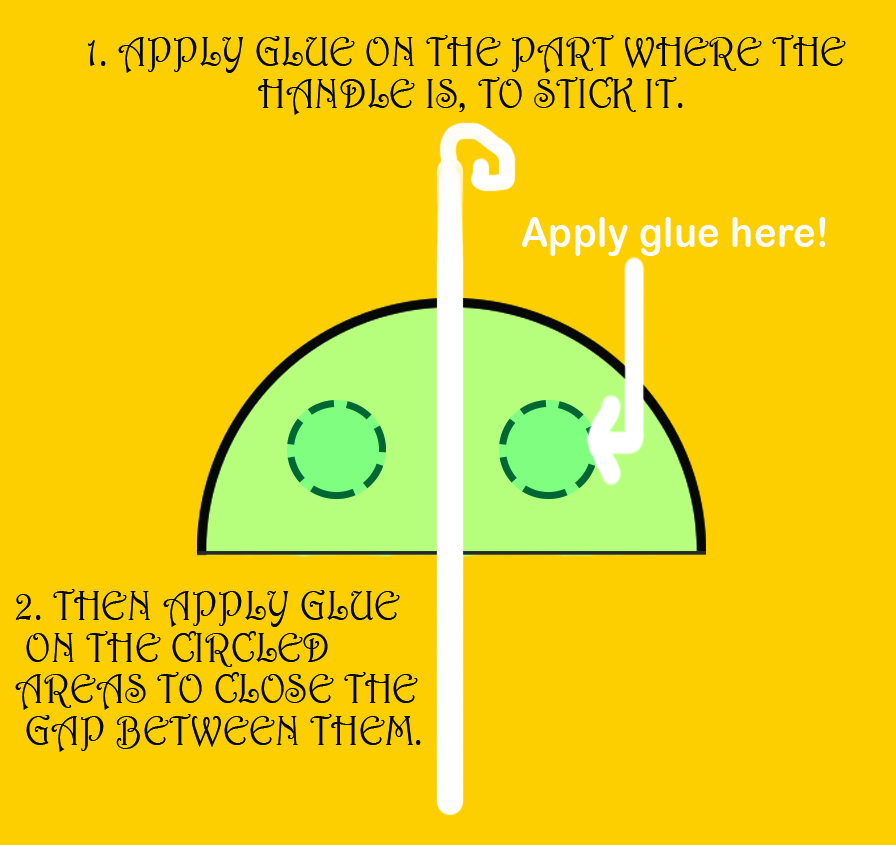
ii. Fold your circles into half and stick by applying glue along the dotted line.

iii. Likewise, apply glue on the circled areas and stick.

v. Now, you should be having something that looks like a quarter of a circle.

vi. Once you have done this process for all the 8 origami papers, it’s time to stick them together to form the top part of the umbrella. On the circled areas on the sides of the folded circles, apply glue and paste the papers to each other. Remember to make sure that you don’t stick just one pair of circle quarters so that there is a gap left in between.

vii. Your umbrella should look like this.

- PROCEDURE FOR THE BOTTOM OF THE UMBRELLA(HANDLE):
i. Take your A4 sheet and roll it diagonally so that you get a stick.
ii. Cut off the ends so that they are flat.
iii. Now curl just the top of this stick using a pencil or quilling tool.

iv. Remember the gap that we left in the top of the umbrella- where did not apply the glue? Apply glue there now, and stick the handle of the umbrella. Then close the gap using some more glue.